Simple Rustic Bread Loaf
With just a few simple ingredients and some patience, you can create a rustic bread loaf that rivals those found in artisan bakeries. This easy-to-follow recipe yields a loaf of bread with a perfect crumb, a crunchy crust, and a flavor that will have you coming back for slice after slice.
Ingredients
- 1000 g bread flour or all-purpose (roughly 8 cups)
- 700 g warm water (roughly 3 cups)
- 22 g salt (about 4 tsp)
- 5 g active dry yeast (about 2 tsp)
Instructions
- Add the flour to a stand mixer and all but 1/4 cup of the water. Mix on low speed until combined. Cover and let rest for 5-10 minutes.
- While the flour rests, mix the active yeast and the 1/4 cup reserved warm water in a small bowl until foamy. Let it sit for 5-10 minutes.
- Add the salt and yeast mix to the stand mixer. Using a bread hook, knead for 5-10 minutes until the dough is elastic and a little tacky.
- Lightly grease a bowl or flour a bread proofing bowl and transfer the dough. Cover and let rise for about two hours or until doubled in size. This will depend on how warm the room is. If it's too cold, you can place it in the oven and turn the oven light on.
- If you want your bread extra fluffy you can fold the bread after rising for 30 minutes. Do this by taking wet hands and pulling up on one side of the dough. Fold it over to the opposite side. Turn 90 degrees and repeat. Do this two more times until the bread has been folded. Recover and let rise for the remaining 1 and 1/2 hours.
- Punch down the dough and transfer to a lightly floured surface. Taking a bench knife or sharp knife, cut the dough into 2 equal pieces. Knead dough for another 1-3 minutes and shape into a round ball. Let sit for about 5 minutes.
- Gently shape the dough into a ball a second time. Place each dough ball seam side down into a bread-proofing bowl or a lightly greased mixing bowl. Cover with a towel or plastic wrap and place them in the fridge. Let them rise a second time for about another 1-2 hours.
- Check your dough by pressing an index finger gently into the top. If it springs back very quickly it is not quite ready. Once it springs back slowly, it is fully proofed. Place a Dutch oven with the lid on in the oven and preheat the oven to 450 degrees.
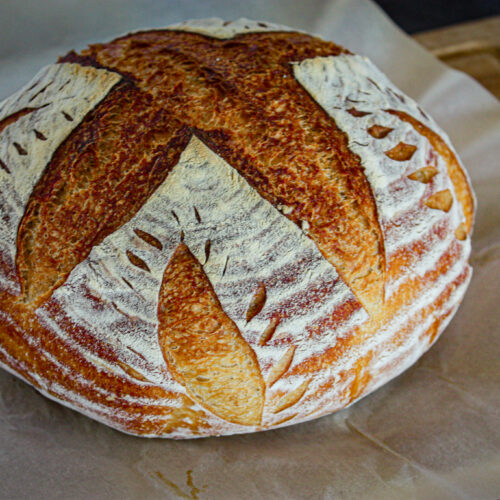
- Once preheated, remove one loaf from the fridge and transfer it to a piece of parchment paper. Score the top of the bread a couple of times with a bread lame or sharp knife. This will allow for steam to escape as it bakes.
- Remove the Dutch oven and place your bread loaf inside. Lightly spray the top of the bread dough with water if you want an extra crispy crust. Cover and bake uncovered for 15 minutes. Remove the lid and bake uncovered for 15 more minutes until the top of the bread is golden brown.
- During the last few minutes of baking, remove your second bread loaf and prepare it exactly as you did the first loaf.
- Remove the bread from the oven and place your second bread loaf into the Dutch oven and replace the lid. Repeat the baking instructions for the second loaf. Transfer each bread loaf to a cooling rack. Let it cool for 20-30 minutes before slicing.
- Once cooled, place the bread in a plastic bag, aluminum foil, or covered container. Store on the counter for 2-3 days or in the fridge for 5-7 days. You can also wrap this bread in plastic wrap and then aluminum foil and keep it in the freezer for up to 3 months. Thaw on the counter or fridge.